- Learn to design eye-catching product boxes without coding or plugins
- Discover how to optimize your product displays for mobile devices
- Explore techniques to customize and reuse your product box designs across multiple posts
Creating visually appealing product boxes is crucial for maximizing your Amazon affiliate earnings. In this post, I’ll walk you through the process of building an attractive Amazon affiliate product box using WordPress, without any coding, plugins, or page builders. Let’s dive in and transform your product displays!
Have you ever noticed how some affiliate marketers seem to have these sleek, professional-looking product displays that just draw your eye? Well, I’m about to let you in on a little secret: you can create those too, and it’s easier than you might think.
I remember when I first started with affiliate marketing. My product links were just plain text, maybe with a small thumbnail if I was feeling fancy. But let me tell you, the difference in click-through rates when I switched to custom product boxes was night and day.
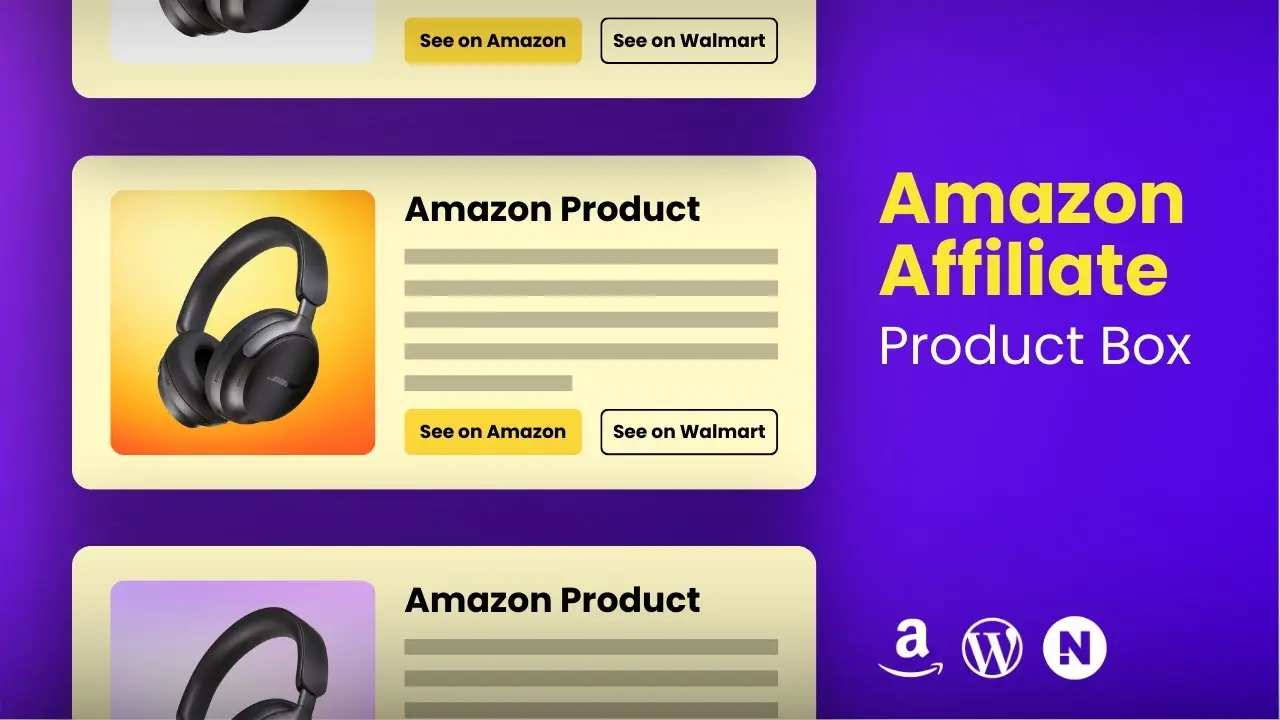
Creating Your Product Box
Let’s start by building our product box right in the WordPress block editor. No need for any fancy plugins or coding knowledge – we’re keeping it simple and effective.
- Start with a Group Block: In your post editor, add a new Group block. This will be the container for our entire product box.
- Add Columns: Inside the Group block, insert a Columns block. We’ll use a 50/50 split to start, but we’ll tweak this later.
- Insert Product Image: In the left column, add an Image block. Upload your product image or select one from your media library. Pro tip: set the aspect ratio to square for consistency across all your product boxes.
- Create Product Details: In the right column, we’ll add:
- A Heading block for the product title
- A Paragraph block for the product description
- A Button block for the call-to-action
- Style Your Elements: Here’s where the magic happens. Adjust the font sizes, colors, and spacing to make your product box pop. I like to use a bold color for the CTA button – it really draws the eye.
Customizing the Layout
Now that we have our basic structure, let’s fine-tune it for maximum impact:
- Adjust Column Widths: Change the left column (image) to 40% and the right column (text) to 60%. This gives your product description more room to shine.
- Add Background Color: Select the Group block and add a background color. I often use a light yellow or blue – it helps the box stand out without being too distracting.
- Round Those Corners: Apply a border radius to both the Group block and the product image. This small detail gives the whole box a more polished look.
- Padding is Your Friend: Add some padding to the Group block. This prevents your content from feeling cramped and improves readability.
Mobile Optimization
In today’s mobile-first world, it’s crucial that your product boxes look great on all devices. Fortunately, the block editor makes this pretty straightforward:
- Check Mobile Preview: Use the editor’s mobile preview feature to see how your box looks on smaller screens.
- Adjust as Needed: If things look off, you can make mobile-specific adjustments to padding, font sizes, or even column layout.
- Test, Test, Test: Always preview your post on an actual mobile device before publishing. What looks good in the preview might need tweaking in real-world conditions.
Reusing Your Design
Once you’ve created the perfect product box, you’ll want to use it again and again. Here’s how:
- Save as Reusable Block: Select your entire product box (the Group block) and save it as a reusable block.
- Edit for Each Product: When you want to use it in a new post, just insert the reusable block and customize the details for your new product.
- Consider Variations: Create a few different styles of product boxes. This allows you to choose the best fit for each product or post.
Pro Tips for Affiliate Success
- Use High-Quality Images: Clear, professional product photos can make a huge difference in click-through rates.
- Write Compelling Descriptions: Focus on benefits, not just features. Tell your readers why they need this product.
- Test Different CTAs: Try various button texts to see what resonates best with your audience. “Check Price on Amazon” or “See Details” might outperform a simple “Buy Now”.
- Update Regularly: Keep your product boxes current. Outdated information or broken links can hurt your credibility and your commissions.
- Disclose Your Affiliation: Always be transparent about your affiliate relationships. It’s not just ethical – it’s required by law in many places.
Creating attractive Amazon affiliate product boxes doesn’t have to be complicated. With these techniques, you can design eye-catching displays that blend seamlessly with your content and encourage clicks. Remember, the key is to provide value to your readers while showcasing products in an appealing way.
Ready to take your affiliate marketing to the next level? Start by implementing these product boxes in your next post. And if you want to dive deeper into WordPress techniques, check out how to create reusable blocks in WordPress. It’s a game-changer for efficiently managing your content.
Happy affiliate marketing, and here’s to boosting those commissions with beautiful product displays!


