“Most WordPress hosting are either fast, cheap, or easy to use. But somehow xCloud strikes all of them. I highly recommend it”
Are you on the hunt for the best, fastest, and most affordable WordPress hosting? You’ve likely come across names like Hostinger, Bluehost, or SiteGround.
While these are well-established brands that many WordPress users rely on, there’s a catch – their pricing isn’t always straightforward.
Take Bluehost, for example. Their cheapest plan starts at less than $3 a month, which seems like a great deal. But look closer, and you’ll see the actual price jumps to $12 a month after the first year.
This introductory pricing strategy is common, but it can leave you paying more in the long run for essentially the same service.
The Triangle of Expectations

It’s often said in the hosting world that you can have good, fast, or cheap – but you can only choose two. For a long time, I thought Cloudways struck the perfect balance. It’s good, it’s fast, and while not the cheapest, it’s reasonably priced.
But what if I told you there’s a new player in town that’s even cheaper than Cloudways? Enter xCloud.
Introducing xCloud

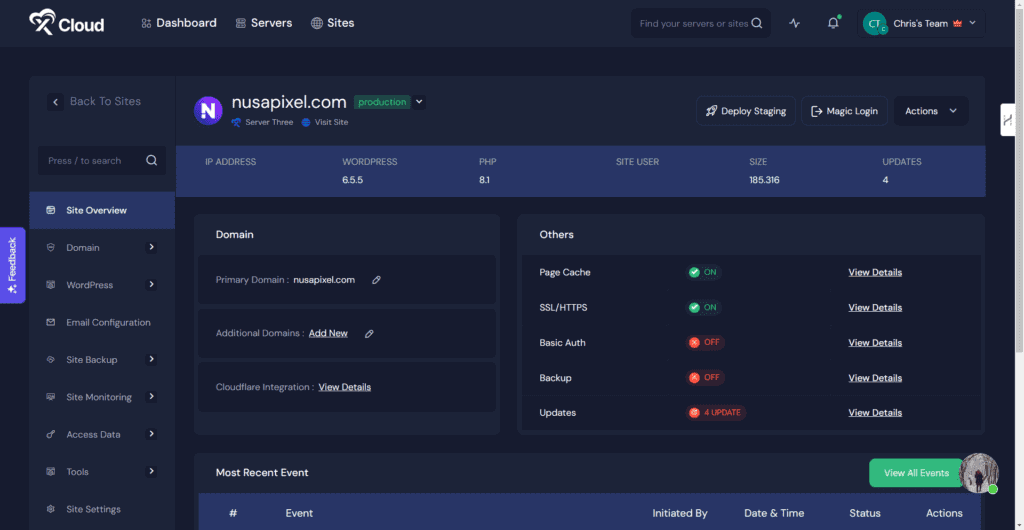
xCloud is a new hosting service that’s shaking up the market. It’s not only more affordable than Cloudways but also offers impressive performance. Let’s dive into how to set up a server on xCloud and migrate your WordPress site.
Setting Up a Server on xCloud
- Visit xCloud
- Click “Join Free” or “Login” if you already have an account.
- Navigate to “Servers” and click “Add a new server”.
- Choose between two types of server management. For this guide, we’ll use xCloud Managed.
- Name your server and choose between General and Premium server types.
- Select your server size. The Newcomer option at $5/month is significantly cheaper than Cloudways’ equivalent at $11/month.
- Choose your server region based on your target audience’s location.
- Enable automatic xCloud backup for just $1/month (highly recommended).
- Select your web server (NGiNX or OpenLiteSpeed).
- Review your choices and click “Next” to create the server.
Migrating Your WordPress Site to xCloud
- Create a staging site on your new xCloud server.
- Install the Migrate Guru plugin on both your original site and the staging site.
- Use the migration key from the staging site to initiate the migration from your original site.
- Wait for the migration to complete (usually 5-30 minutes).
- Change the domain name on xCloud from the staging name to your actual domain.
- Integrate with Cloudflare if you’re using it for seamless DNS updates.
- Clear the cache on your new xCloud-hosted site.
- Make necessary adjustments, like removing unnecessary plugins and enabling xCloud’s recommended caching plugins.
Performance Comparison: xCloud vs. Cloudways

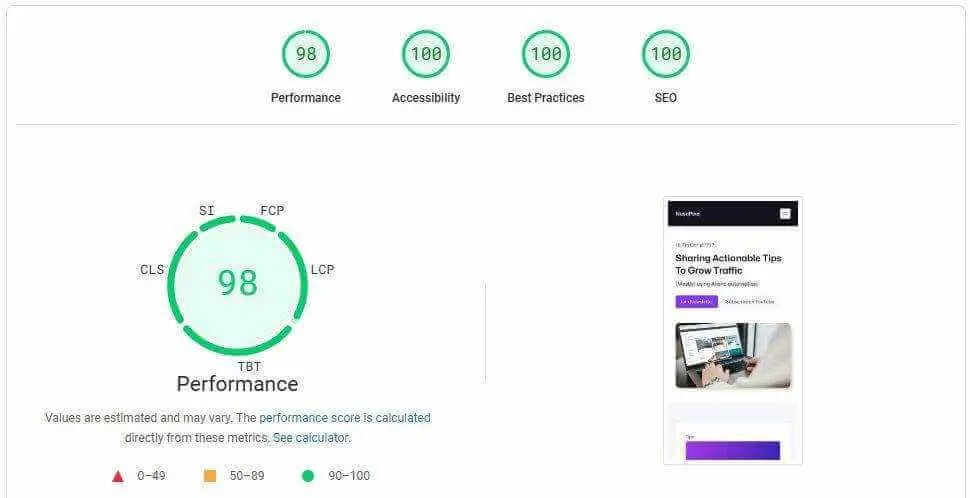
After migrating my main website from Cloudways to xCloud, I ran some performance tests. The results were impressive:
- Cloudways: Mobile performance score of 81, perfect desktop score.
- xCloud: Mobile performance score jumped to 98, with a perfect desktop score.
These results show that xCloud, despite being half the price of Cloudways, delivers superior performance with minimal optimization.
Final Thoughts

xCloud offers an impressive balance of affordability and performance. It’s not just cheaper than Cloudways; it also provides better speed out of the box.
However, remember that optimal website performance isn’t just about hosting. It’s crucial to manage your WordPress site efficiently, including minimizing the number of plugins you use.
If you’re interested in further optimizing your WordPress site and reducing your plugin count, check out my article on the topic.


